
Some Carbon Skin in the Game
In the never ending quest to make my car lighter… I had inadvertently made it heavier.
My new-to-me 9 Lives racing wing makes probably double the downforce of my old ebay carbon wing… but it was aluminum. While aluminum is light as an alloy… it was still significantly heavier than poorly made carbon fiber.
So, how can we make the entire system lighter to match what it once was? Moar carbon!
No, not the wing… but something steel… my trunklid.
Awhile ago I emailed Anthony at XV racing about the possibility of making me a special trunklid. Anthony makes some of the best quality carbon fiber stuff you can get for our cars, seriously, check out his website: https://xvracing.com/
I wanted one of his amazing trunklids… but, even lighter. Since I rarely open my trunk… why not go full race car and make it a skin. That’s right, no skeletal structure underneath, no hinges, no latch, and no cable to the cabin.
Anthony was immediately psyched on the idea, and said he would lay up a skin for me with an extra layer of carbon to be stiffer than his typical skin, but still lighter than complete trunklid. He also gave me a solid price for the kind of quality I was expecting. I took the bait and sent him some money to get it built.
What showed up a few weeks later was amazing.

So, we needed to fabricate some brackets. Bring on the CAD.
It’s so light it doesn’t make sense when you pick it up. 2 pounds, 15 ounces.
The finish wasn’t his show quality (he added a UV protectant into the epoxy and skipped the clear coat to be lighter), but I knew that when I requested a true racecar part. Still, the piece is 9/10 ready for a car show. If I were to clear it, it would be perfect.
Obviously, with a piece this lightweight, we can’t just bolt the wing onto it. I wanted to mount it to the actual chassis anyways. My old steel trunklid was showing the stress of many track days, and was slightly bent in a few spots from the downforce it had seen, even with additional bracing.

You know by now when I say CAD I mean cardboard aided design.
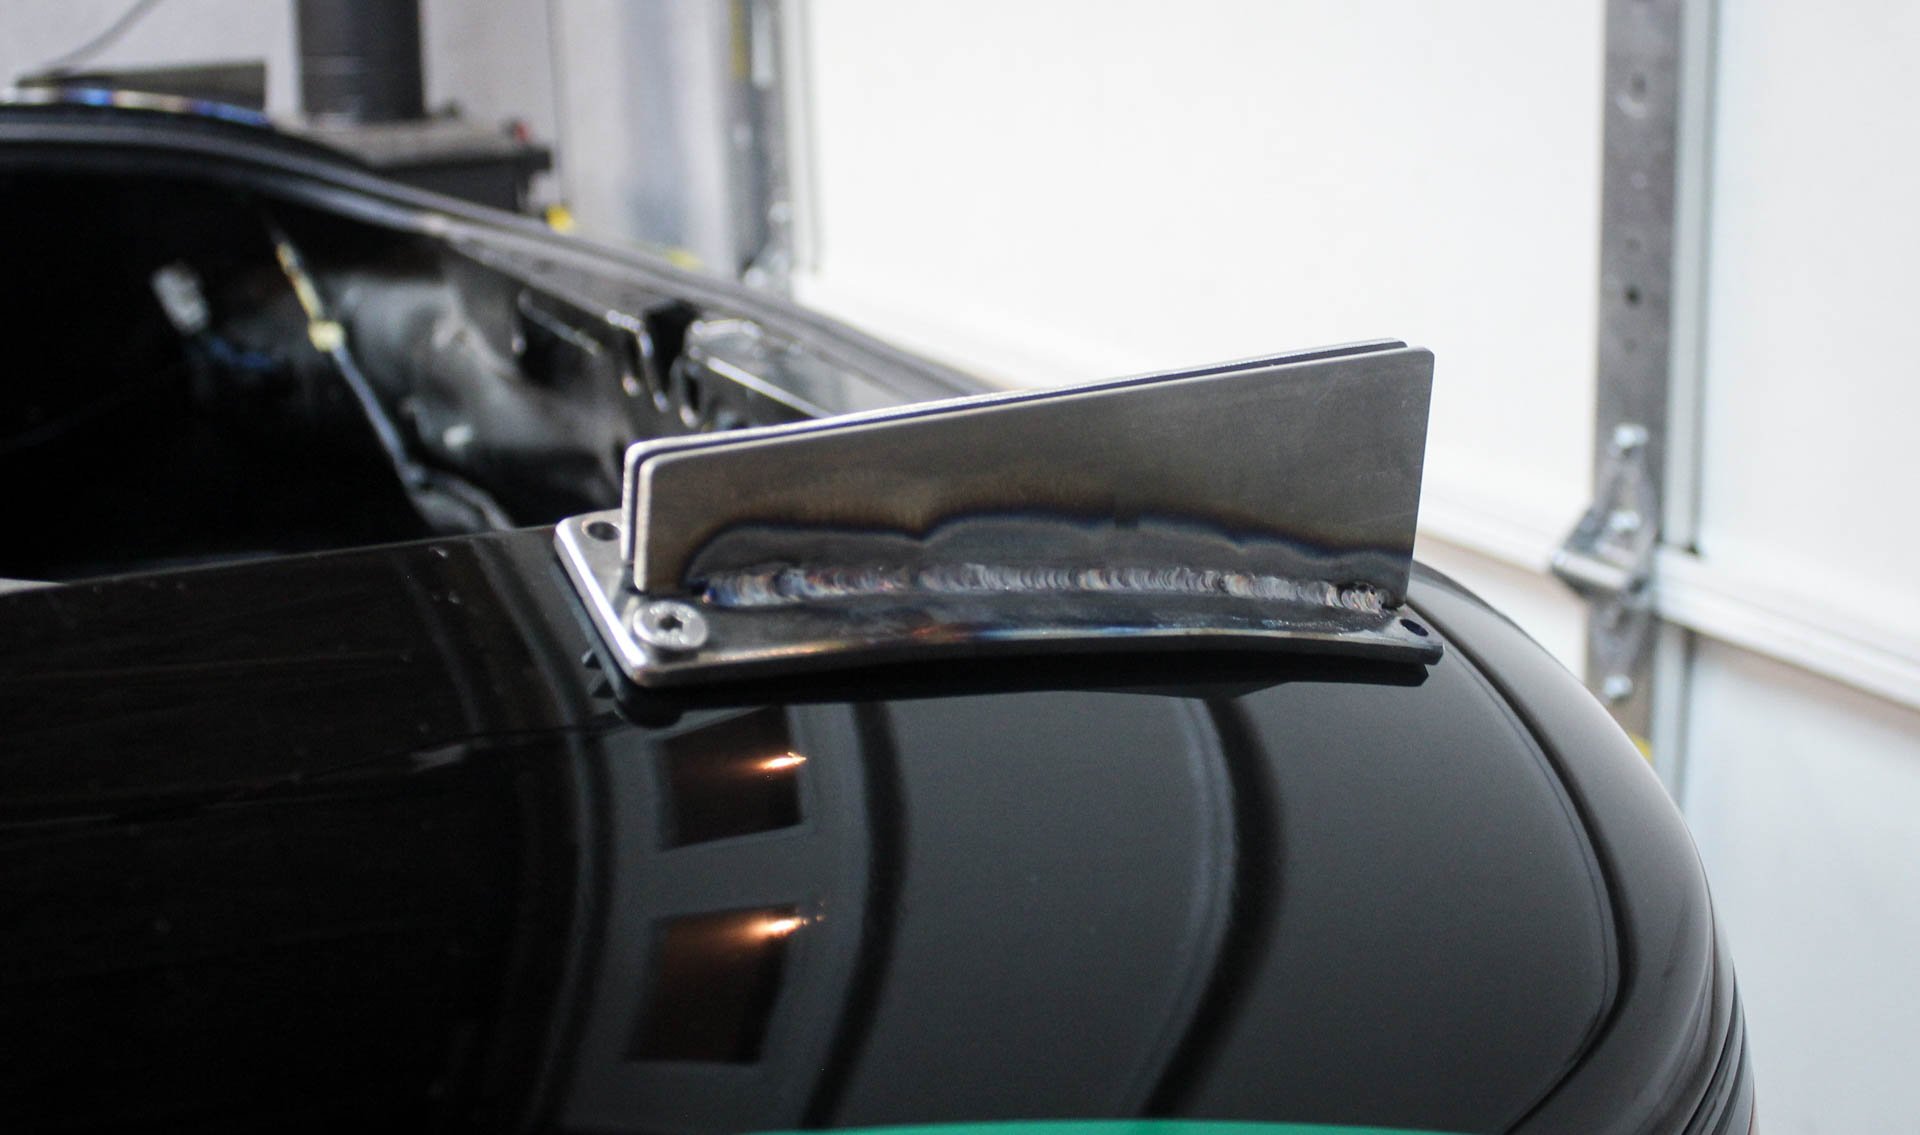
This would be perfect to hold the uprights, and due to the compound curves of the sheetmetal, is a very strong part of the chassis.
Once I was happy with the basic design, I cut out some 3/16” thick steel and whacked it with a hammer over a piece of large scrap pipe (I am a pipefitter, of course I had a couple pieces of scrap in my work truck). This helped match the curve of the rear chassis.


Then, we reached another point of no return. We reach those points a lot with this car. Let’s drill some holes.
Once I cut out the uprights of the mount bracket, I tacked it together and drilled holes in the baseplate piece.

Then I brought out my trusty Chineseum tig welder and welded the uprights out.
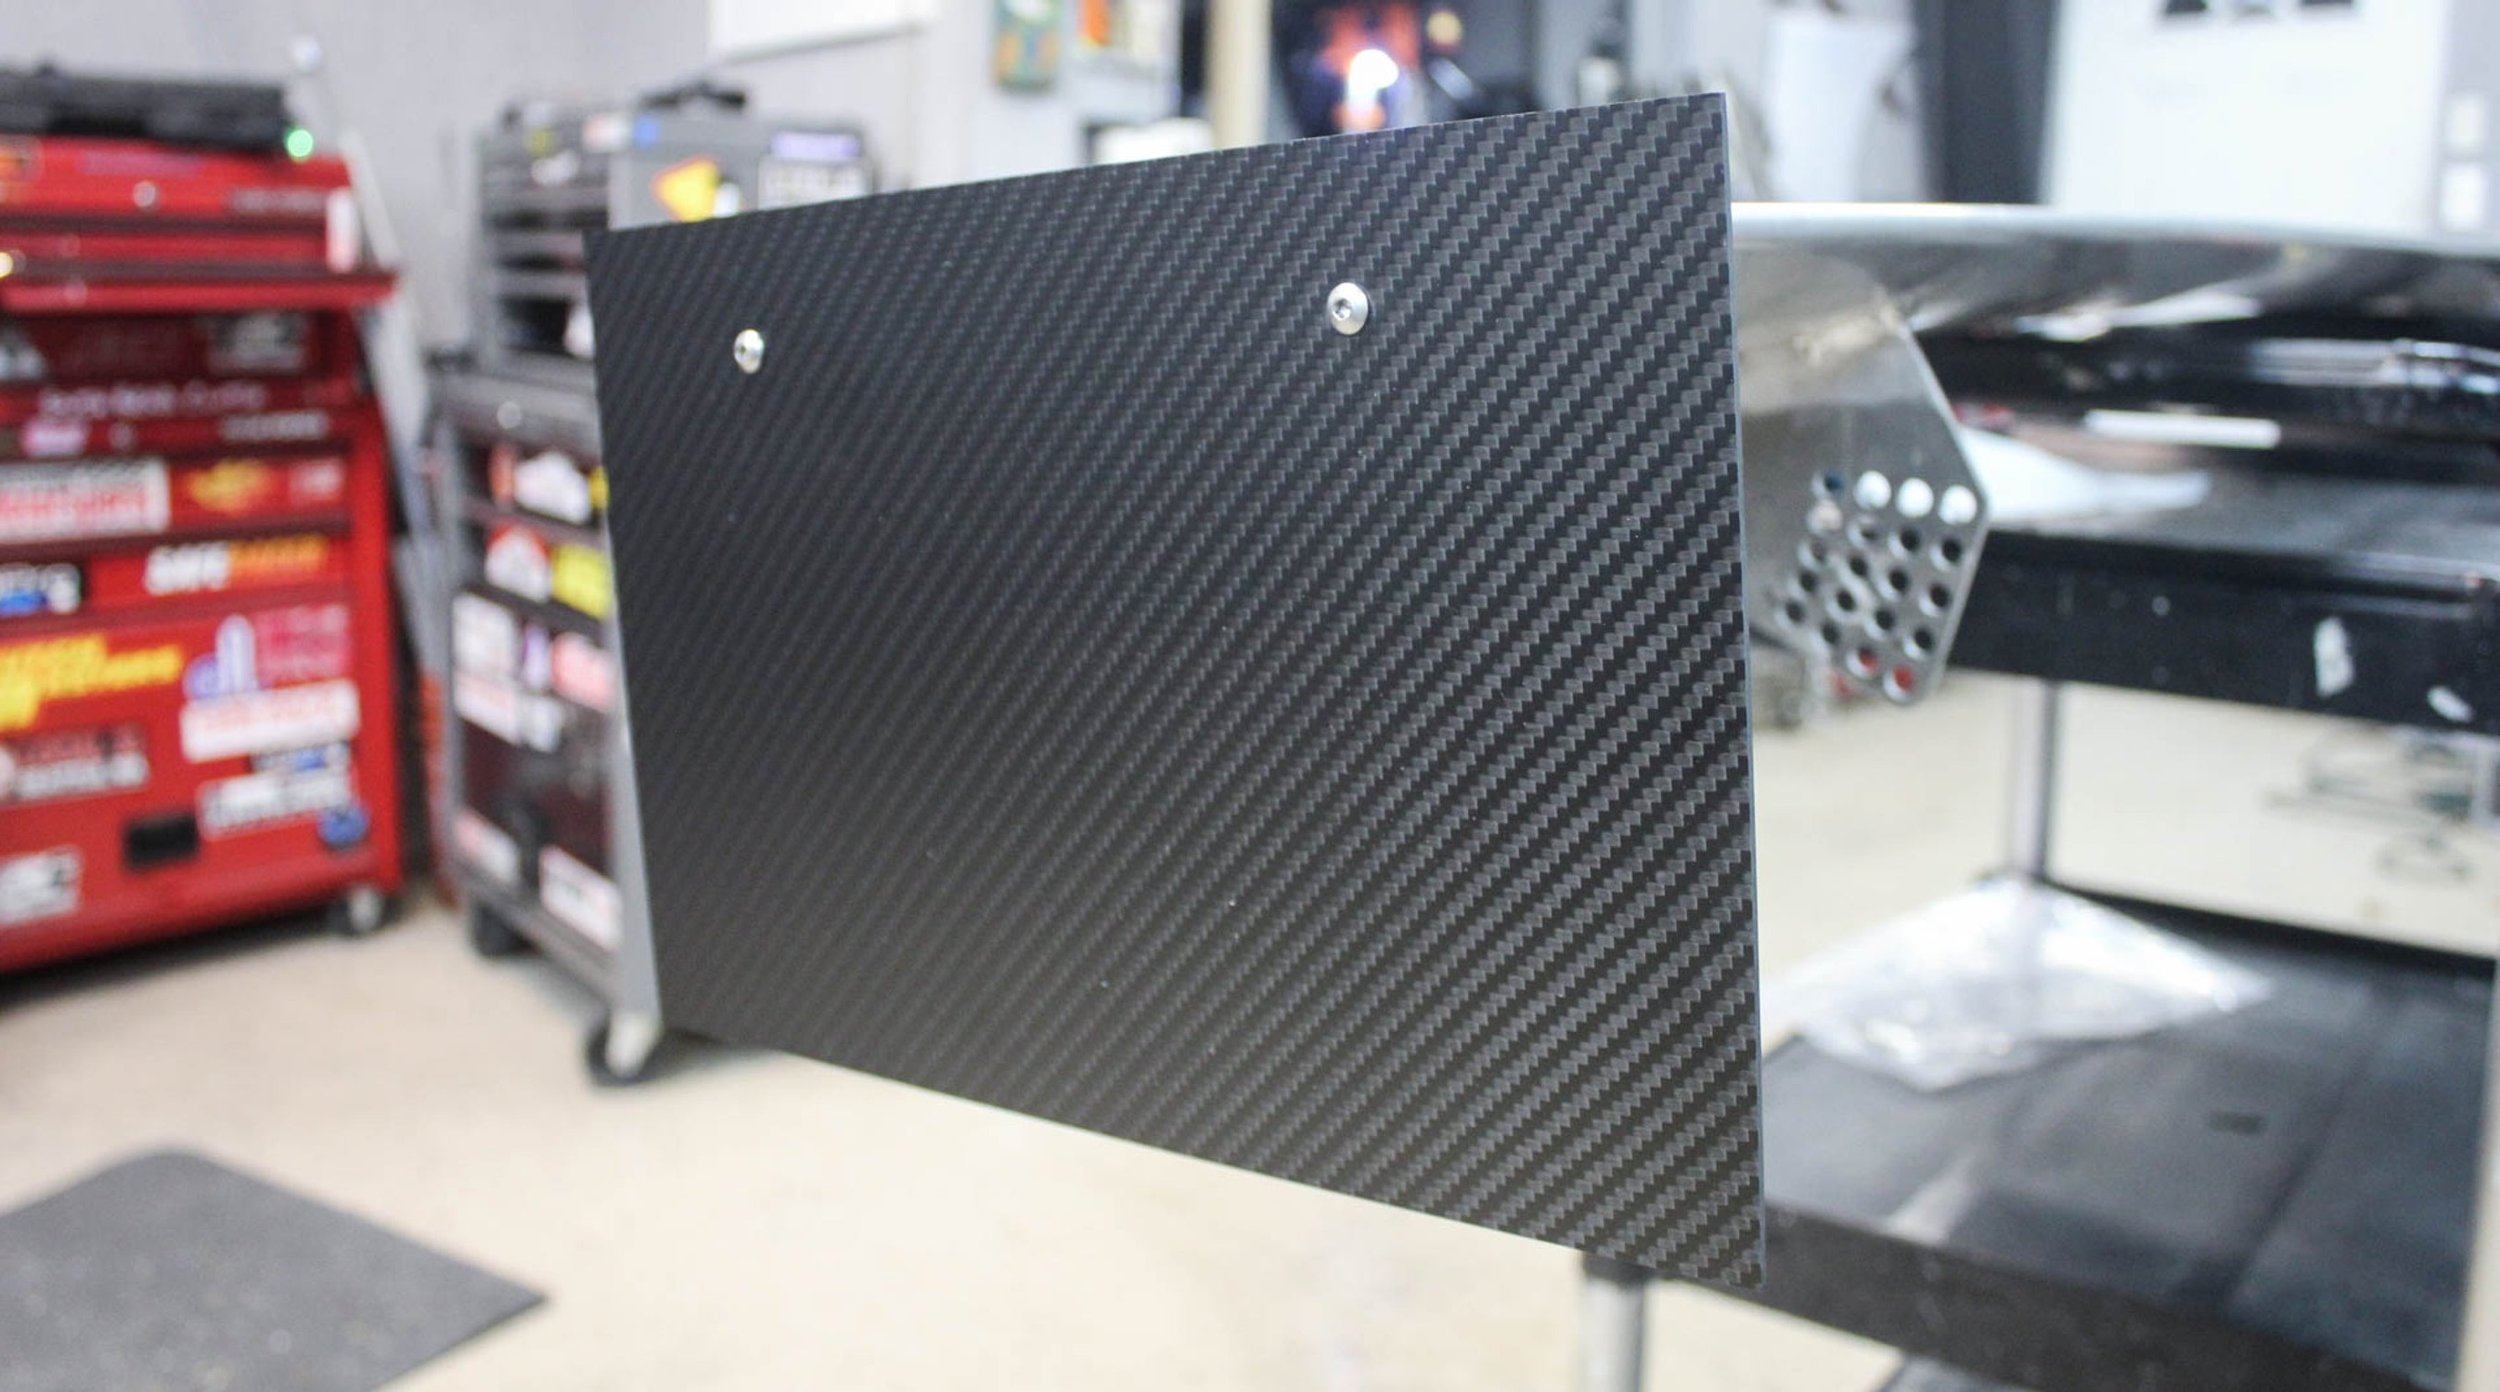
My wing was used, and the endplates were very used. The previous owner just had a big piece of black duct tape to hide the old mounting holes. I decided to lighten things up a few ounces here and make my own from blank carbon sheet.

After making these I found an interesting article about wing endplate design that has me wanting to modify these a bit to potentially reduce drag significantly. I will try to optimize them later.

We also needed to cut off the mount plates on the underside of the wing and re-weld those wider to fit our new wider upright positions. I can do a lot of things, but unfortunately I can’t weld aluminum. Well, I probably could do it… but I don’t have the $1500 weld machine to do it. So, I called an old friend, Ian at Rat2 Motorsports and he said bring the wing over and he’ll take care of it for me.
He made quick work of welding onto some pretty dirty aluminum. Thanks a ton Ian, I owe you a cider or 6!
The wing was ready, the mounts were pretty much ready, we needed some uprights.
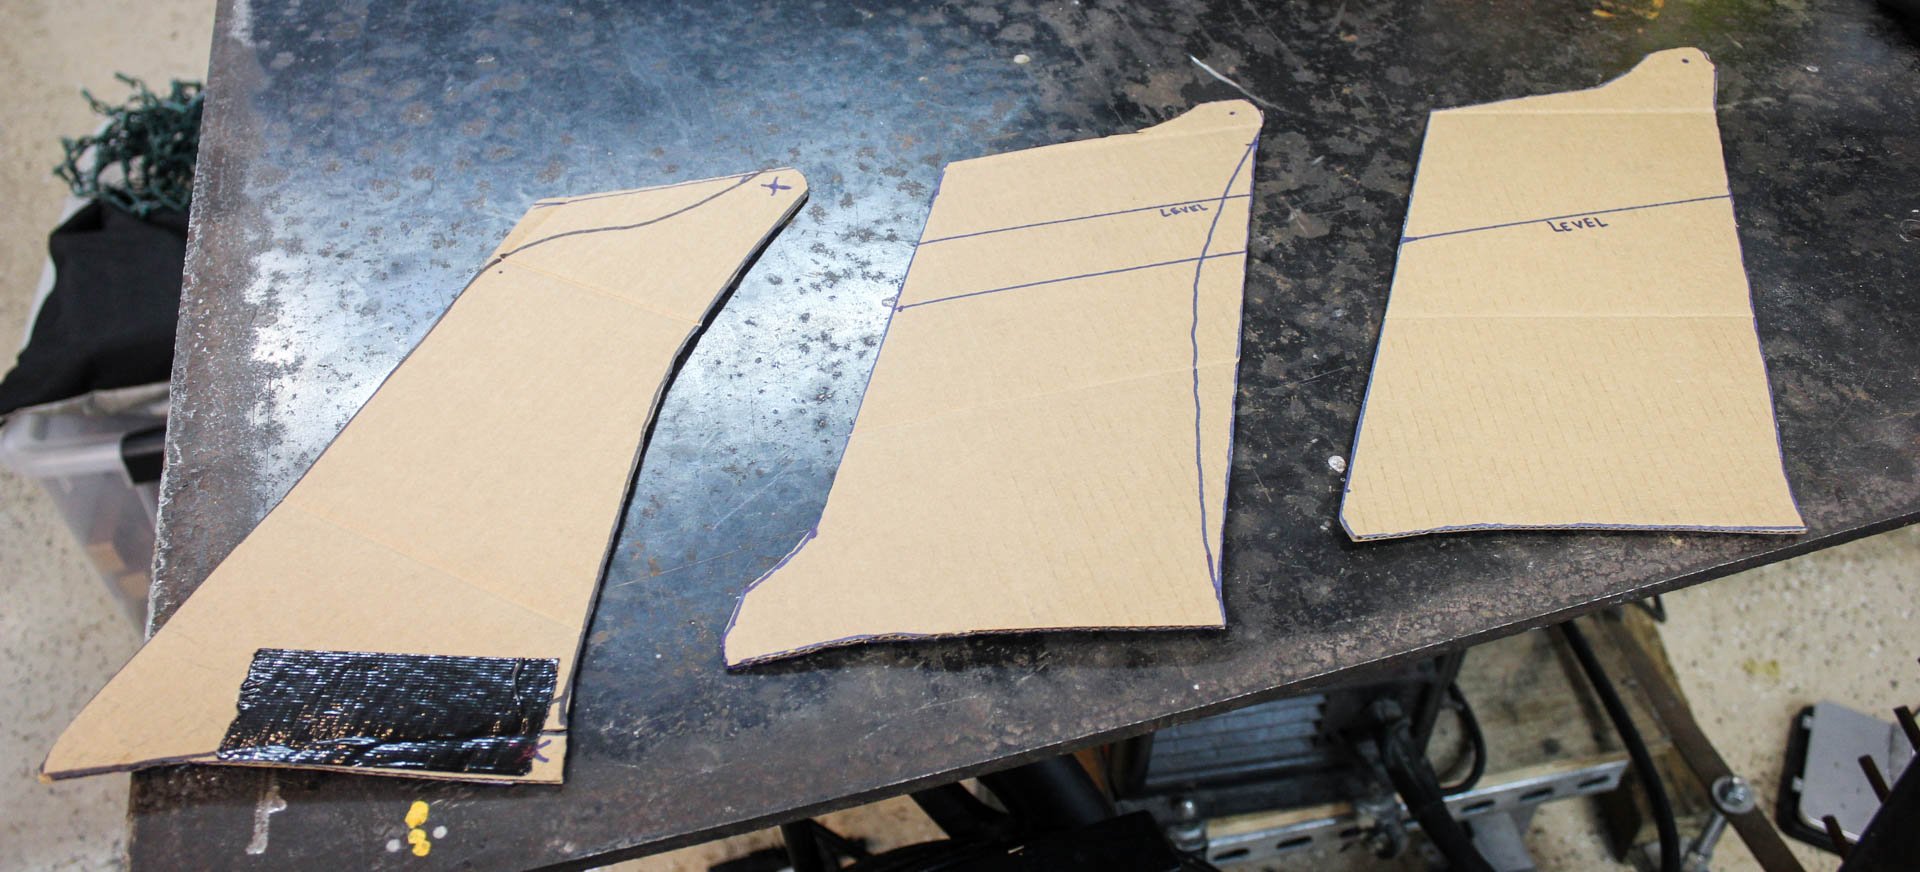
My design and shape went through a couple versions before I found something I liked. You see my marks for level while testing the designs on the car. I was trying to find a balance point between leaning the wing back and overall strength.
My old uprights were 3/8” thick aluminum. They were plenty strong. So strong I hollowed them out with large holes and saved 1.5 pounds. But, that also causes turbulence in the air below the wing, where you want airflow as laminar as possible. So, I spent my credit card cashback points on a nice slab of 5mm thick carbon fiber plate.

With a 2’ x 2’ plate, I had enough to cut out both uprights. Using a jigsaw with fine metal blade, it cut through it really nicely. As I always say, WEAR A RESPIRATOR when cutting this stuff. Carbon dust is no joke.

With my holes drilled in the baseplates, things were looking good! I ran to ACE and picked up some stainless buttonhead hardware to assemble the wing and figure out my angle of attack.

I mounted my endplates so they were parallel with the wint angle of attack Meaning whatever angle I wanted to lean the wing, it would be the same on my endplate. This makes wing angle change easy to measure. With the gurney flap on the wing, it’s difficult to measure the angle across the chord. With things set at 5 degrees, I drilled holes for the airfoil. I did the same for 10 degrees. The mount bracket on the underside of the wing has about 20 holes in it for various angles, and for 0 AoA, one of the holes lined up perfectly with my 10 degree hole on the uprights.
The wing was on! Now we need to mount the trunk skin, and make sure it’s easy to get on and off in a hurry if need be.
The answer, as you can probably see in the picture above, is with dzus fasteners.
Dzus fasteners, or quarter turn fasteners, are affordable and reliable quick realease fasteners for race car body parts. Mostly used with drag stuff, they’re super handy. I’ve had them for years on my f40 engine lid and they’ve been great, so why not use them for the trunk lid too.
So, I decided to do the same for the new trunk skin.


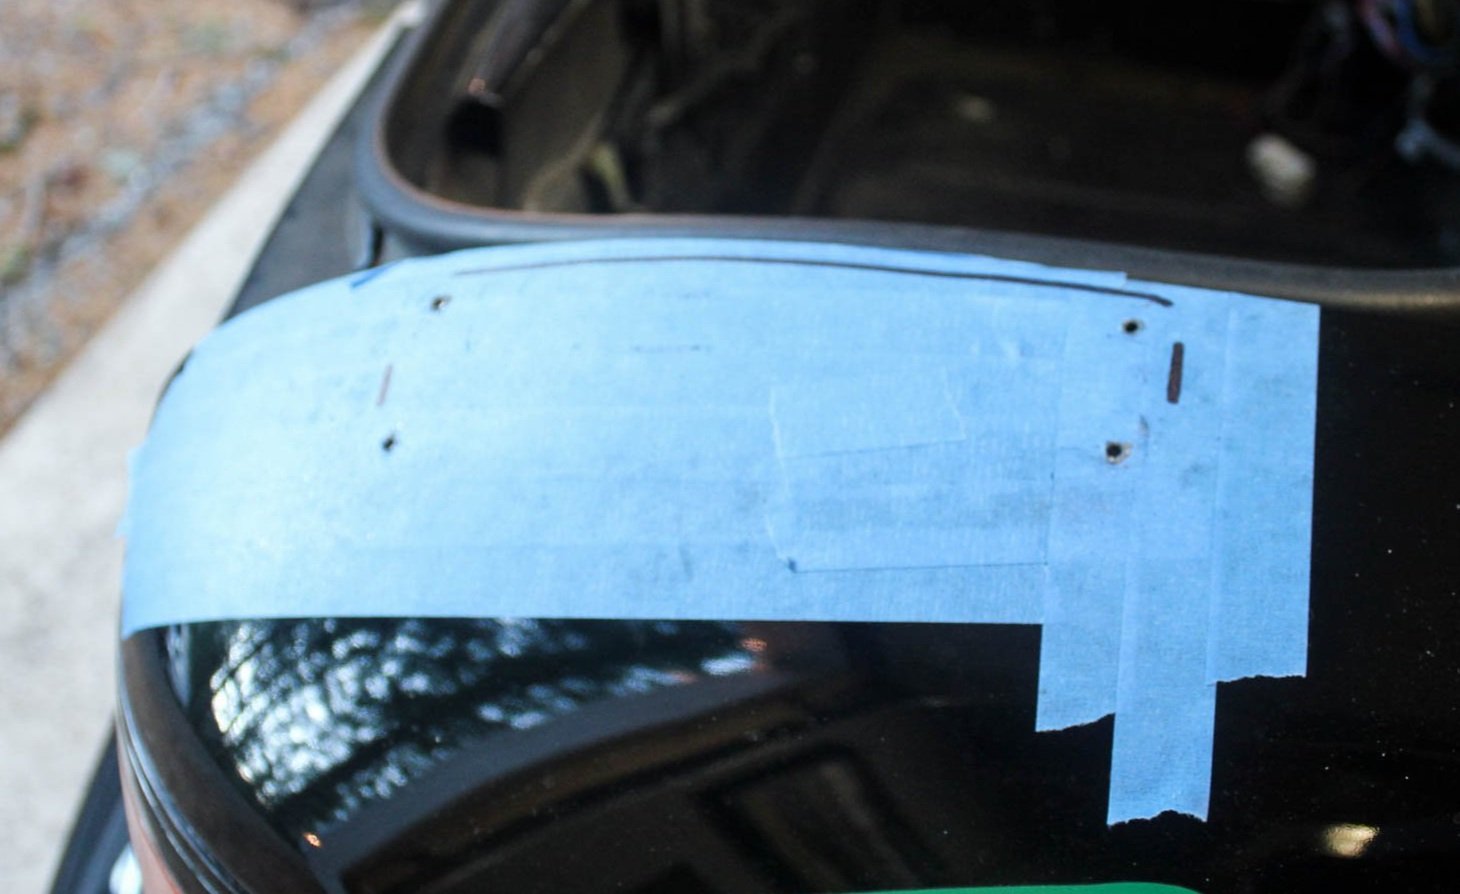
I started by figuring out exactly where I wanted my fasteners on the skin, then marked it out. Blue tape helps.
The point of no return.


Then I mounted the attachment brackets to the chassis. These are fairly easy to mount and manipulate for great fitment of the panel.


Drill a few 1/8” holes for the rivets to hold the dzus clips on.

I don’t have a clear photo of it, but you must rivet on the catch pin for the fasteners to the attachment brackets. That's what give the quarter turn pin something to grab onto.
I used 5 fasterners all together and things seem very solid. I will probably put a go pro back there and go for some highway speed drives to make sure the skin isn’t flapping in the turbulent air too much. I can brace it a bit more… but that does add weight.
Speaking of weight, how did we do on out project?
Well, before, with my ebay carbon wing, the total weight of the steel trunk together with the hinges, latch, weather stripping, and pull cable, the grand total was: 35 pounds, 10oz.

The new set up, including the much heavier wing, carbon skin, uprights, mounts, and hardware, weighs in at 23 pounds 10 oz.
Quick math tells us we saved 12 pounds. Not bad! It was an expensive 12 pounds no doubt, but saving that kind of weight off the rear of the car and gaining about double the downforce is quite a big mod. I’ve run out of almost all the “easy” weight reduction on the back half of the car, besides wiring, which not sure I want to tackle just yet.

I would still like to wrap the aluminum wing black before spring, which will add a few ounces back onto the car, the things we do to look cool.
We have more winter mods coming, and track season is starting sooner than ever for me, early March!